Introduction
As businesses scale their operations, centralised identity management becomes crucial to ensure security and operational efficiency. Keycloak, a powerful open-source Identity and Access Management (IAM) solution, simplifies this by offering Single Sign-On (SSO) and centralized authentication. This guide will walk you through integrating Keycloak with Grafana, GitLab, and Jenkins, streamlining user management and authentication.
In this guide, we will:
-
- Configure Keycloak as the Identity Provider (IdP).
- Set up OAuth2/OpenID Connect (OIDC) for Grafana, GitLab, and Jenkins.
- Provide detailed troubleshooting tips and insights to avoid common pitfalls.
By following this guide, you’ll have a unified authentication system, ensuring that users can access Grafana, GitLab, and Jenkins with one set of credentials.
Keycloak Overview
Keycloak is an open-source Identity and Access Management (IAM) solution that provides SSO with modern security standards such as OpenID Connect, OAuth2, and SAML. It supports various identity providers (e.g., LDAP, Active Directory) and provides a rich user interface for managing realms, users, roles and permissions.
Architecture Diagram
This diagram illustrates the integration of Keycloak as a central identity and access management system. It facilitates Single Sign-On (SSO) for various external identity providers (IDPs) and internal applications.
Components:
-
- Keycloak
- Acts as the core Identity Provider (IdP) for the architecture.
- Manages authentication, authorization, and user sessions across connected services.
- Facilitates Single Sign-On (SSO), allowing users to log in once and access multiple services seamlessly.
- External Identity Providers (IDPs)
- Keycloak integrates with external IDPs for user authentication.
- OpenID Connect (OIDC) and SAML protocols for federated identity management.
- Google and Microsoft for social and enterprise logins.
- Keycloak redirects user login requests to these external providers as configured, enabling users to authenticate with their existing credentials.
- Internal Applications
- Keycloak
-
-
- Keycloak provides SSO support for internal services.
- GitLab for source code management.
- Jenkins for continuous integration/continuous delivery (CI/CD) pipelines.
- SonarQube for static code analysis and quality monitoring.
- These applications delegate authentication to Keycloak. When users access these services, they are redirected to Keycloak for login.
-
Workflow:
-
- Authentication with External IDPs:
- A user trying to log in to any service is redirected to Keycloak.
- If configured, Keycloak can redirect the user to an external provider (e.g., Google or Microsoft) to authenticate.
- Once authenticated, the user is granted access to the requested service
- Single Sign-On (SSO):
- Keycloak generates and manages an SSO session after successful authentication.
- Users only need to log in once. All other integrated services (e.g., GitLab, Jenkins, SonarQube) can reuse the same session for access.
- Authorization:
- Authentication with External IDPs:
-
-
- Keycloak ensures proper access control by assigning roles and permissions.
- Applications fetch user roles and permissions from Keycloak to enforce fine-grained authorization.
-
Keycloak's Key Features
-
- Single Sign-On (SSO): Users log in once to access multiple services.
- Centralized Authentication: Manage authentication for various services from a central location.
- Federated Identity: Keycloak can authenticate users from LDAP, Active Directory or other identity providers.
- Role-based Access Control (RBAC): Assign users specific roles and permissions across services.
Prerequisites
Before beginning, ensure you have the following:
-
- Keycloak: Installed and running. You can deploy Keycloak using Docker, Kubernetes, or install it manually.
- Grafana: Installed and running.
- GitLab: Installed and running (either self-hosted or GitLab.com).
- Jenkins: Installed and running.
- SSL Certificates: It’s highly recommended to secure your services with SSL to ensure secure communication.
Ensure you have administrative access to each service for configuration purposes.
Part 1: Keycloak Setup
Step 1: Install and Access Keycloak
Keycloak can be deployed via Docker, Kubernetes, or manually on a server.
For Docker:
docker run -d \
-p 8080:8080 \
-e KEYCLOAK_USER=admin \
-e KEYCLOAK_PASSWORD=admin \
quay.io/keycloak/keycloak:latest
For Kubernetes, you can deploy Keycloak with Helm or a custom Kubernetes manifest. Make sure Keycloak is accessible to Grafana, GitLab, and Jenkins, either through DNS or IP.
Step 2: Create a New Realm
A Realm in Keycloak is a space where you manage users, roles, clients, and groups. Each realm is isolated, meaning users and configurations don’t overlap between realms.
-
- From the Keycloak admin console, click on the top-left dropdown and select Add Realm.
- Name the realm (e.g., DevOpsRealm) and click Create.
- Ensure you select an appropriate Display Name and Internationalization settings if your user base spans different regions.
Step 3: Add Users and Assign Roles
You can now create users and assign them roles:
-
- Navigate to Users -> Add User.
- Fill in the user details and click Save.
- After the user is created, go to the Credentials tab and set the password.
- You can also manage roles under the Role Mappings tab to define custom permissions.
Step 4: Configure Clients (Grafana, GitLab, Jenkins)
Clients in Keycloak represent the applications that will use Keycloak for authentication. For each service (Grafana, GitLab, Jenkins), we’ll create a client that uses the OIDC protocol.
-
- Grafana Client Setup:
-
-
- Go to Clients -> Create.
- Set the Client ID to grafana, and choose OpenID Connect as the protocol.
- Set the Root URL to http://<grafana-host>, and the Redirect URIs to http://<grafana-host>/login/generic_oauth.
- Enable the following flows: Standard Flow, Implicit Flow (if needed), and Direct Access Grants.
- Save the client and navigate to the Credentials tab to copy the generated Client Secret.
-
-
- GitLab Client Setup:
- Go to Clients -> Create.
- Set the Client ID to gitlab and choose OpenID Connect.
- Set the Redirect URI to http://<gitlab-host>/users/auth/openid_connect/callback.
- Enable Standard Flow and Implicit Flow if GitLab requires it.
- Save the client and copy the Client Secret from the Credentials tab.
- Jenkins Client Setup:
- GitLab Client Setup:
-
-
- Add a new client for Jenkins, following the same steps as above.
- Set the Redirect URI to http://<jenkins-host>/securityRealm/finishLogin.
- Export the client-json file from client actions to configure in the next steps.
- Export the json file as shown below.
-
Part 2: Integrating Keycloak with Grafana
Step 1: Configure Grafana for OAuth2
Grafana supports OAuth2 natively, and Keycloak uses OpenID Connect as the protocol for OAuth2.
-
- Grafana’s Configuration: Locate the grafana.ini file (or environment variables for a Docker container) and configure OAuth2 settings:
[auth.generic_oauth]
enabled = true
client_id = grafana
client_secret = <Grafana_Client_Secret>
auth_url = http://<keycloak-host>/realms/<Your_Realm>/protocol/openid-connect/auth token_url = http://<keycloak-host>/realms/<Your_Realm>/protocol/openid-connect/token
api_url = http://<keycloak-host>/realms/<Your_Realm>/protocol/openid-connect/userinfo scopes = openid profile email
-
- Restart Grafana: After updating the configuration, restart Grafana:
For Manual:
systemctl restart grafana-server
For Docker:
docker restart <grafana-container-name>
Part 3: Integrating Keycloak with GitLab
GitLab supports OIDC natively for SSO, making it straightforward to integrate with Keycloak.
Step 1: Configure GitLab for OpenID Connect
- GitLab Configuration: Open GitLab’s gitlab.rb configuration file and enable OIDC:
gitlab_rails[‘omniauth_enabled’] = true
gitlab_rails[‘omniauth_providers’] = [
{
name: “openid_connect”,
label: “Keycloak”,
args: {
name: “openid_connect”,
scope: [“openid”, “profile”, “email”],
response_type: “code”,
issuer: “http://<keycloak-host>/realms/<Your_Realm>”,
discovery: true,
uid_field: “preferred_username”,
client_auth_method: “basic”,
client_options: {
identifier: “<GitLab_Client_ID>”,
secret: “<GitLab_Client_Secret>”,
redirect_uri: “http://<gitlab-host>/users/auth/openid_connect/callback”
}
}
}
]
- Reconfigure GitLab: After editing gitlab.rb, run:
For Manual:
sudo gitlab-ctl reconfigure
For Docker:
docker restart <gitlab-container-name>
Step 2: Test the Integration
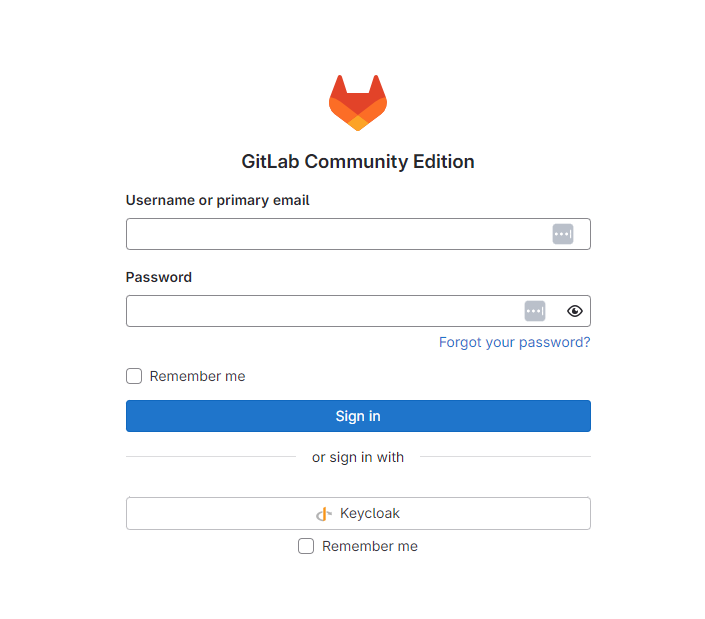
Log out of GitLab, then visit the login page. You should see a “Sign in with Keycloak” option. Clicking it will redirect you to Keycloak for authentication, and once logged in, you’ll be redirected back to GitLab.
Troubleshooting GitLab Integration:
-
- Invalid UID Field: If authentication succeeds but user data is incorrect, check that uid_field in the gitlab.rb configuration is set to preferred_username.
- Client Secret Mismatch: Ensure the client_secret in GitLab matches the secret in Keycloak’s client settings.
-
- Invalid Token Response: If you get errors related to invalid tokens, ensure your GitLab instance is reachable from Keycloak and that your OAuth2 flow is configured correctly in Keycloak.
Part 4: Integrating Keycloak with Jenkins
Step 1: Install and Configure Keycloak Plugin
-
- Install the Plugin: In Jenkins, go to Manage Jenkins -> Manage Plugins, search for the Keycloak OpenID Connect Plugin, and install it.
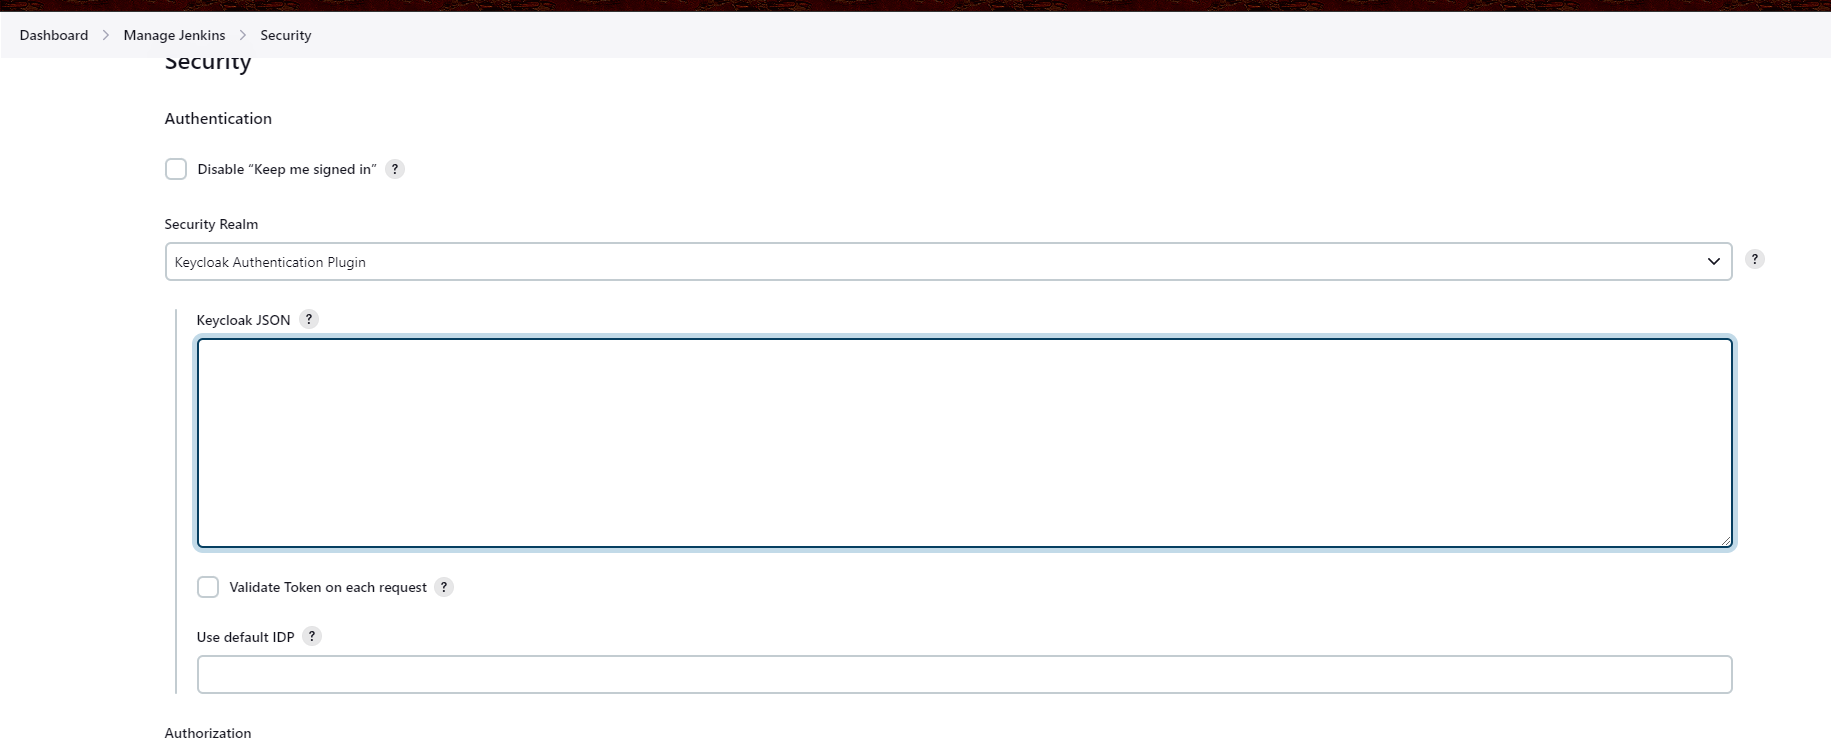
- Configure Keycloak in Jenkins:
- Go to Manage Jenkins -> Configure Security.
- Under Security Realm, choose Keycloak Authentication.
- Upload the client-json file which is exported from the client configuration step.
- Upload the json file in keycloak json field.
-
- Save and Test the Configuration: Log out of Jenkins and test the login with Keycloak.
Troubleshooting Jenkins Integration:
-
- Redirect URI Mismatch: Double-check that the redirect URI set in Keycloak matches Jenkins’ redirect path (/securityRealm/finishLogin).
- Access Denied Errors: Ensure users have been assigned roles in Keycloak that map to appropriate Jenkins permissions.
- Plugin Issues: If the plugin behaves unexpectedly, verify you have the latest version installed and that Jenkins’ logs provide more detailed errors.
Note: All the 3 apps are now integrated with keycloak. So if you login to any service with keycloak, automatically you’ll be logged into all the 3 apps.
Conclusion
Integrating Keycloak with Grafana, GitLab, and Jenkins provides a unified and secure authentication system. This setup reduces complexity, enhances security, and improves user experience by enabling SSO across your DevOps tools.
Simplify authentication and enhance security across your systems. Get started today!
Frequently Asked Questions (FAQs)
Keycloak is an open-source Identity and Access Management (IAM) solution that supports Single Sign-On (SSO) for applications. It provides centralized user management, secure authentication, and protocol support like OAuth2 and OpenID Connect. By using Keycloak, you can streamline access control and enhance security across multiple applications, reducing the need for managing credentials separately in each tool.
Yes, Keycloak supports integration with multiple applications using different authentication protocols like OpenID Connect, OAuth2, and SAML. You can create separate clients in Keycloak for each application (Grafana, GitLab, Jenkins), all managed under a single realm.
Yes, Grafana, GitLab, and Jenkins can all be integrated with Keycloak using the OpenID Connect (OIDC) protocol. This ensures consistent and secure authentication across all services using Keycloak as the Identity Provider.
Permissions and roles can be managed both within Keycloak and each application. In Keycloak, you can assign roles to users, which can be passed to the application during authentication. Each application (Grafana, GitLab, Jenkins) can then map these roles to their internal permission models. For example, in Grafana, you can map Keycloak roles to Grafana’s organization roles.
A "redirect URI mismatch" error occurs when the redirect URI specified in Keycloak doesn’t match the one configured in the client application. Ensure that the redirect URI in the client configuration in Keycloak matches exactly with what’s defined in Grafana, GitLab, or Jenkins, including protocols (http vs https), port numbers, and path names.
If you receive an "invalid client ID or secret" error, verify the following:
- Ensure that the client ID and client secret entered in the application’s configuration (Grafana, GitLab, Jenkins) match exactly what is defined in Keycloak for that particular client.
- Regenerate the client secret in Keycloak if necessary and update it in the application configuration.
- Check that there are no typos in the configuration files, and ensure the Keycloak client is enabled.
Yes, Keycloak allows customization of its login page. You can modify themes, change the logo, colors, and layout, or create a completely custom login page by uploading a custom theme to Keycloak. This allows you to offer a consistent branding experience for your users across different applications.
If user information is not being retrieved correctly (e.g., email, profile data), ensure that:
- The scopes (openid, profile, email) are configured correctly in the client settings for each application.
- The User Info endpoint is accessible, and there are no network restrictions blocking it.
- The appropriate claims are being released from Keycloak. You may need to check the Mappers in Keycloak’s client configuration to ensure that the correct user attributes are being sent.
Keycloak handles user sessions centrally. For Grafana, GitLab, and Jenkins, ensure that:
- Session timeouts and token expiration settings in Keycloak are configured appropriately to match the expected behavior in your applications.
- Token introspection is working, allowing the applications to verify tokens issued by Keycloak.
- If users are logged out from Keycloak, they are also logged out from the integrated applications (SSO logout).