This is the 2nd in our series of articles on using RocketChat as an Open Source Enterprise Communication
Platform as an alternative for Slack or Microsoft Team and enhancing the capabilities by integrating one of the most popular Open Source Chat Bots RASA to simplify and enhance customer engagement as one of the steps to accelerate Digital transformation of the organization.
Do you get a ton of questions from your clients? A lot of queries and doubts? A bunch of text messages?
Replying to each one of them takes a lot of time. For this purpose, you need to employ a devoted customer support crew. Eventually, it augments extra resources to your team to be paid, which is certainly a big issue.
What can be a feasible solution? It’s super easy!
Develop an efficient, conversational AI chatbot for your business. You only need to capitalize on it once,
but it functions for your whole customer support squad.
RASA is an incredibly powerful open-source framework used by developers worldwide for building AI
chatbots and contextual assistants that can be incorporated into other chat platforms. This can enhance
customer support and empower your business.
As RASA supports various channels to incorporate, the Rocketchat service is one of them. For this, we
should have to understand how the RASA chatbot functions. To follow this article adequately, we should
have a RASA bot in good working condition.
Aim: To merge the RASA Chatbot with Rocketchat.
Objective :
● Setup the Rocketchat in the system.
● Configure the administration and New Integration.
● Configure the RASA Bot side.
● Provide the Intents in Rocketchat
Procedure
➔ How to SetUp RocketChat?
Wondering how, to begin with, the setting up on RocketChat? Here’s a step by step guide to steer the
way through the entire process!
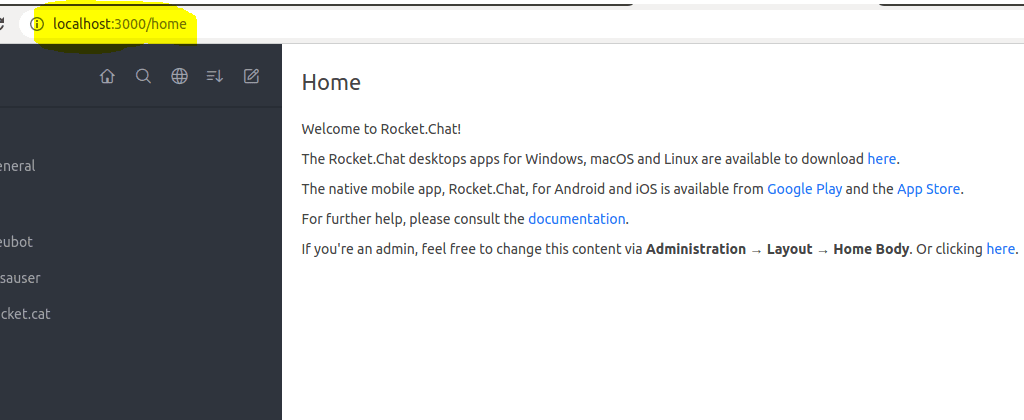
Step-1: First and foremost, you need to install, set up, and log in to Rocket. Chat in your system, which is
running to 3000 port (by default).
Step-2: Upon successful installation, enter the essential administrator information and create a users and credentials login. It is advised to allow notifications via Show notifications dialogue.
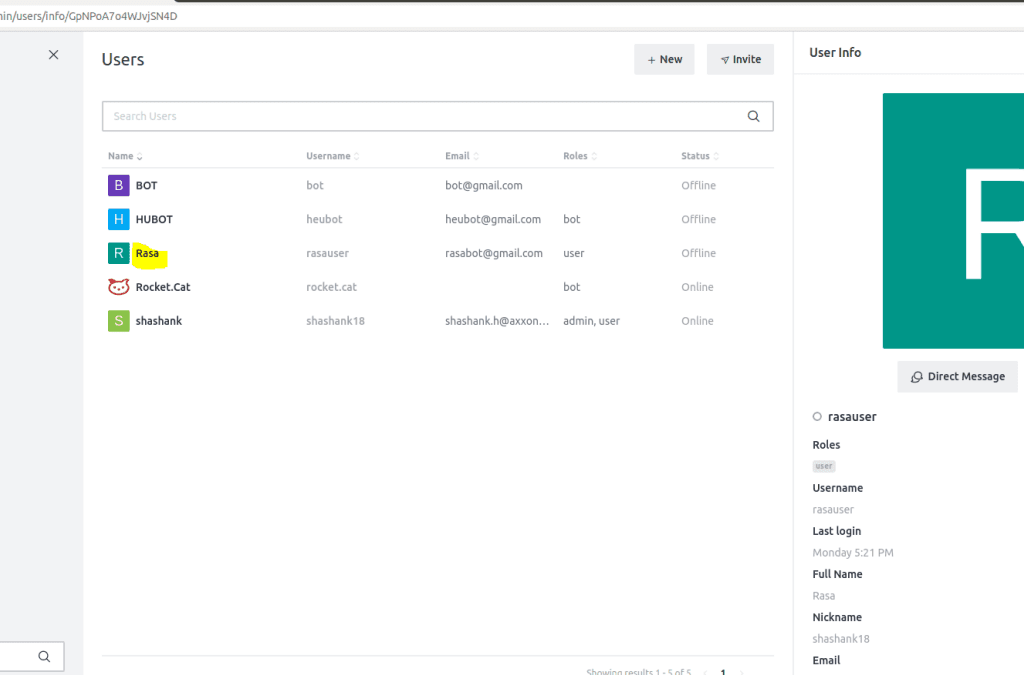
Step-3: Now, create a user that will be used to post the message, and set its credentials at credentials file. This user will act as a Bot in the Rocket.Chat and will answer back to the end-users (from the bot side).
Note: We have described in our earlier article here how we can enable SSO ( Single Sign On) and integrate Enterprise User management in Rocket Chat using SAML with WSO2 (a leading open source Identify Access Provider IdP)
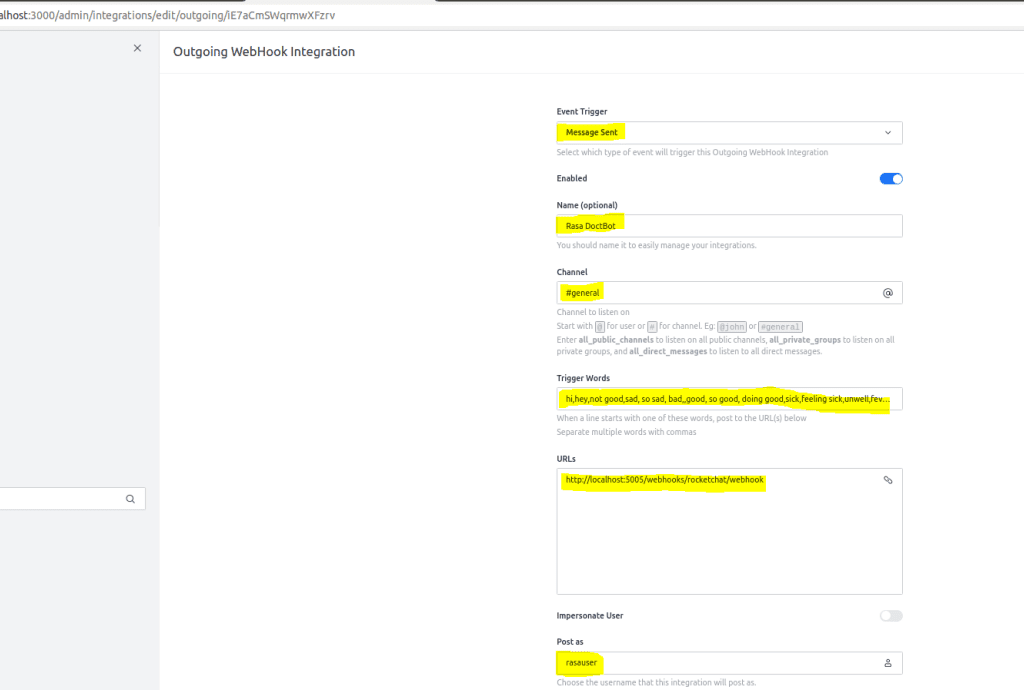
Step-4: Next, develop a Rocket.Chat outgoing webhook and go to Administration -> Integration and choose the new Integration.
Step-5: After that select the “Outgoing Webhook Integration”.
Step-6: Set the Event Trigger message section to the value as “Message Sent”.
Step-7: Fill out the details, encompassing the channel you want the bot to listen to.
As we can give “#general”, “@specific_user”, “all_public_channels”,
“all_private_groups” and “all_direct_messages”.
Step-8: It is also possible to set the Trigger Words section with @yourbotname so that the bot doesn't
trigger on everything that is said. It will activate when you call them with @youbotname.
Step-9: In the URLs section, set the URL to “http://<host>:<port>/webhooks/rocketchat/webhook”,
replacing the host and port with the relevant values from your current operating RASA server.
Congratulations! Your Rocket.chat server is now deployed and prepared to connect your crew members, clients and partners.
➔ Configurations from the RASA side:
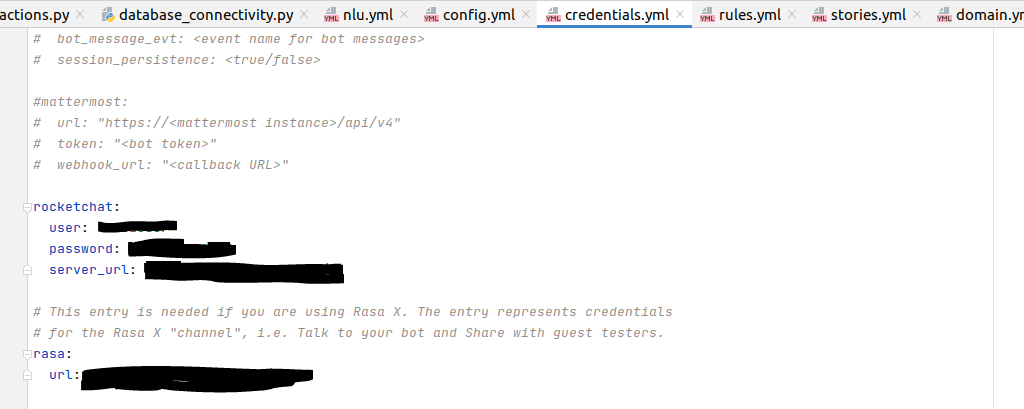
Step-1: Go to the RASA bot “credentials.yml” file and add the RocketChat information as ;
“rocketchat:
user: “<RASA USER NAME>”
password: “<RASA USER PASS>”
server_url: “<ROCKETCHAT HOST>” “
Step-2: Go to “config.yml” and permit the “pipeline” and “policies”. Register the server selecting the suitable option and approving the Terms & Privacy Policy.
Step-3: After this run the ‘rasa action server’ and make the rasa server up and running.
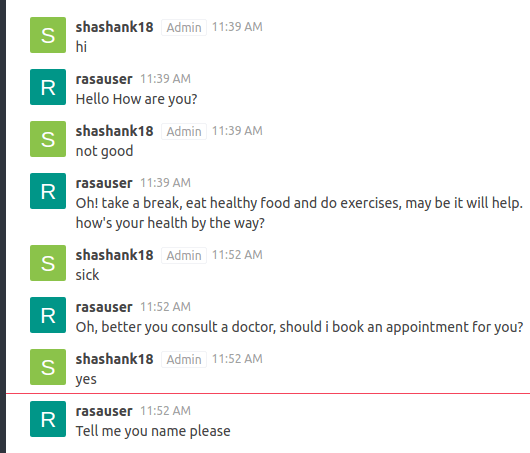
Step-4: Then as per the general information regarding your company you have provided in the configurations of rocket chat, call it as in the chat window. The Rasa bot user will trigger from there.
Step-2: Go to “config.yml” and permit the “pipeline” and “policies”. Register the server selecting the suitable option and approving the Terms & Privacy Policy.
Step-3: After this run the ‘rasa action server’ and make the rasa server up and running.
Step-4: Then as per the general information regarding your company you have provided in the configurations of rocket chat, call it as in the chat window. The Rasa bot user will trigger from there.
Get in touch with us for more information and to help have this setup and operationalized in a short time.